Daily Calendar Math for Kinders

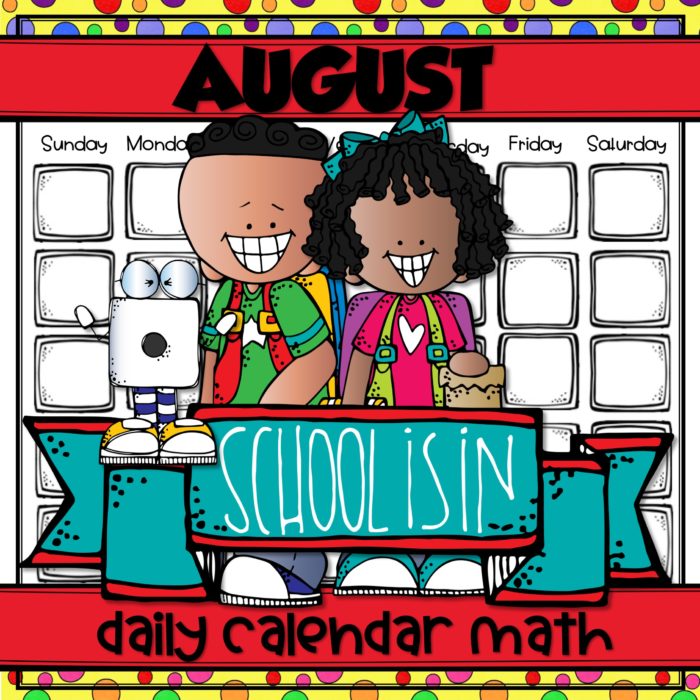
Before I tell you all about this new bundle of DAILY CALENDAR MATH for KINDERS, hop over to my store and grab this freebie. It is yours, free, until 1 August!

As you download each month, you will notice that you receive 3 files: 1. The DCMK file has all of the student worksheets. 2. The TLK file is a colorful Talk-To file that you can project via your Smartboard, or onto a white board and work the problems with your students. 3. The DailyLabel file has a set of Melonheadz day of the week cards (for your pocket chart calendar) and the yesterday, today, tomorrow cards for that month. These cards use direction and sequence to help teach your kinders a sense of time.

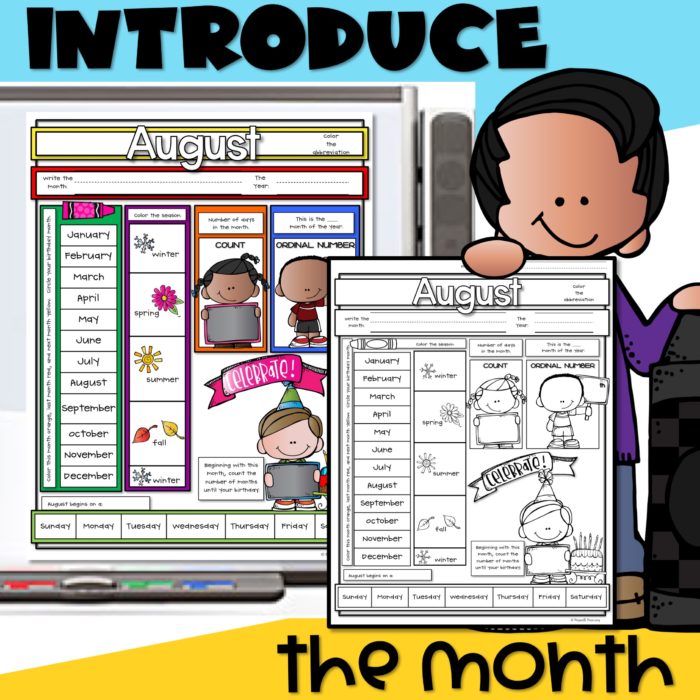
You will begin each month by introducing its essential components: how to spell the month, its abbreviation, its ordinal number, the months before and after it, its season, the year, the number of days in the month, what day of the week the month began and finally, how many months are left until your students’ birthdays.

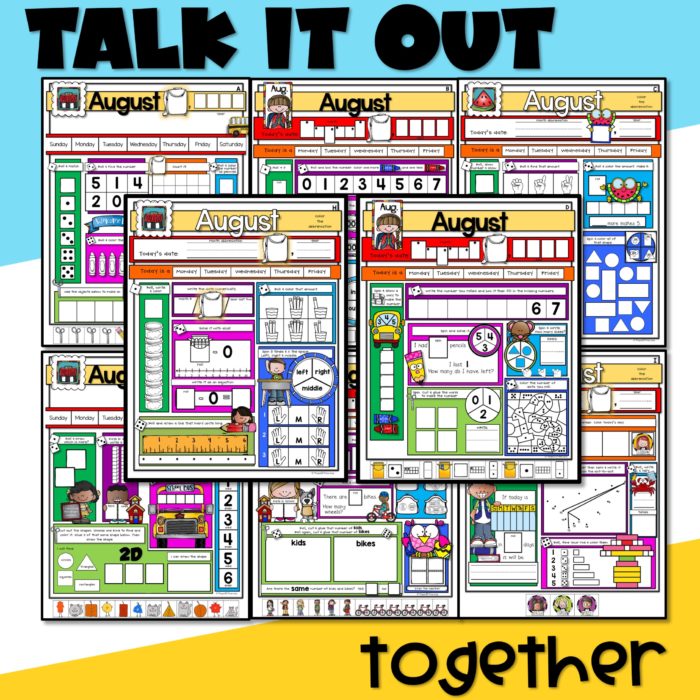
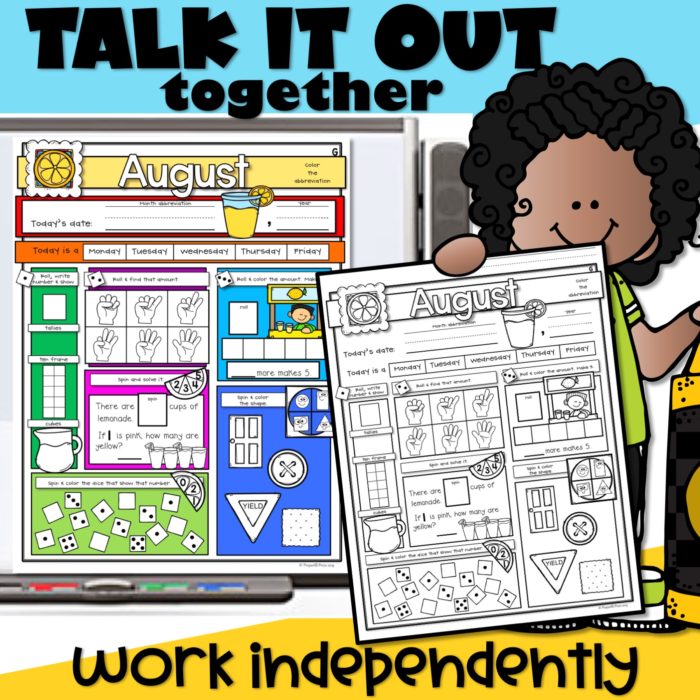
As I mentioned before, each month has a TALK-TO file. These you can project and “fill-in” with your students. Or you can simply use them to go over the directions. These TALK-TO sheets match the ones your students will be completing:

You can use manipulatives to help your students solve the daily math problems. This month focuses on the classroom, so they will count crayons, pencils, math cubes, Cuisenaire rods, Play-doh containers, kids, bikes, their fingers and pennies. They will need a die, paperclip–to spin, scissors, glue, and a crayon or pencil to complete each sheet.

There is at least one sheet each month that has a Cuisenaire rod problem. For August, the Cuisenaire problem focuses on identifying the value of each rod. Future months will ask your students to find rods that are +1 the number they rolled; find rods that =10; color the rods and skip count the number they rolled, etc. So, it would be helpful to have these rods available to build the Cuisenaire image.

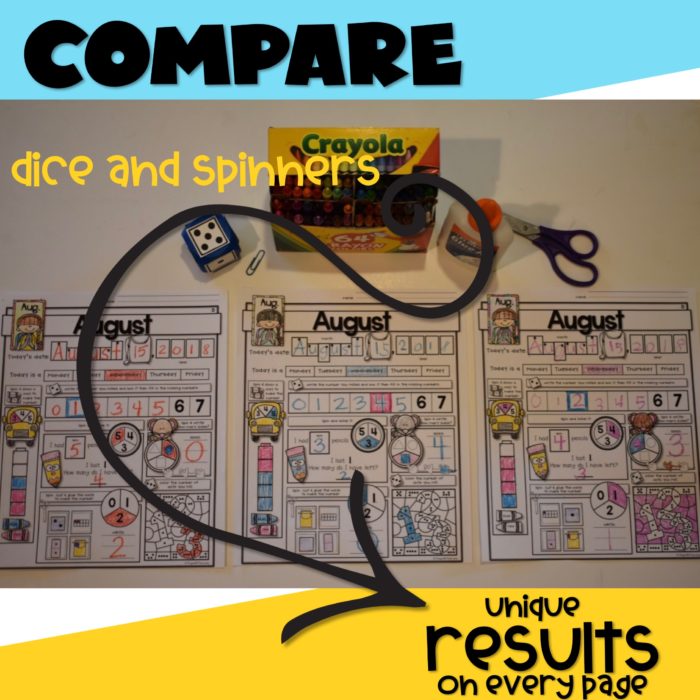
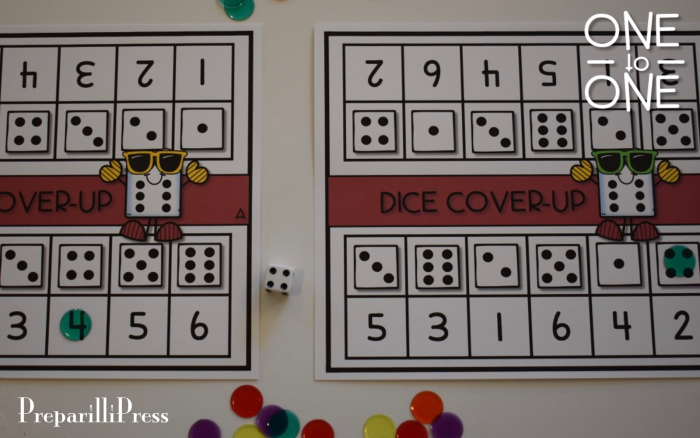
Since every problem uses dice or a spinner, you can re-use these sheets throughout the month–each time with new results. You could also have a small group MATH CHAT and discuss the unique results group of students had on the same sheet.

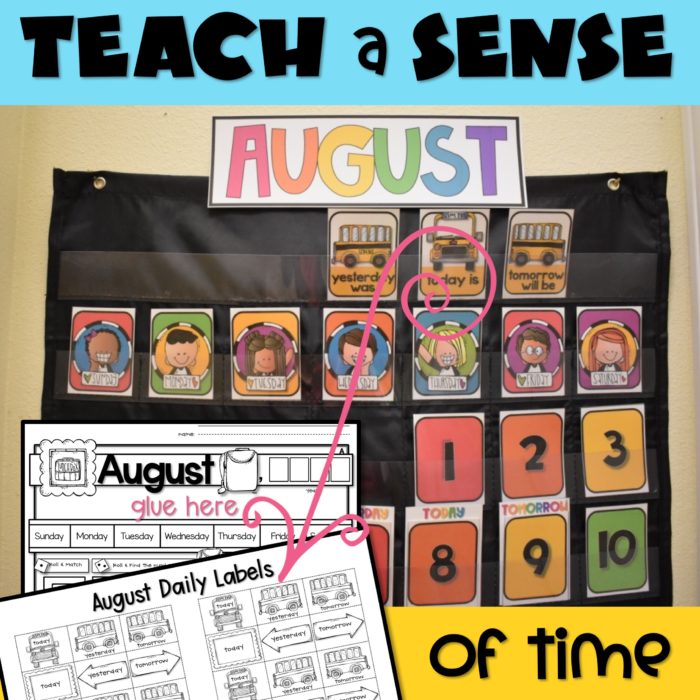
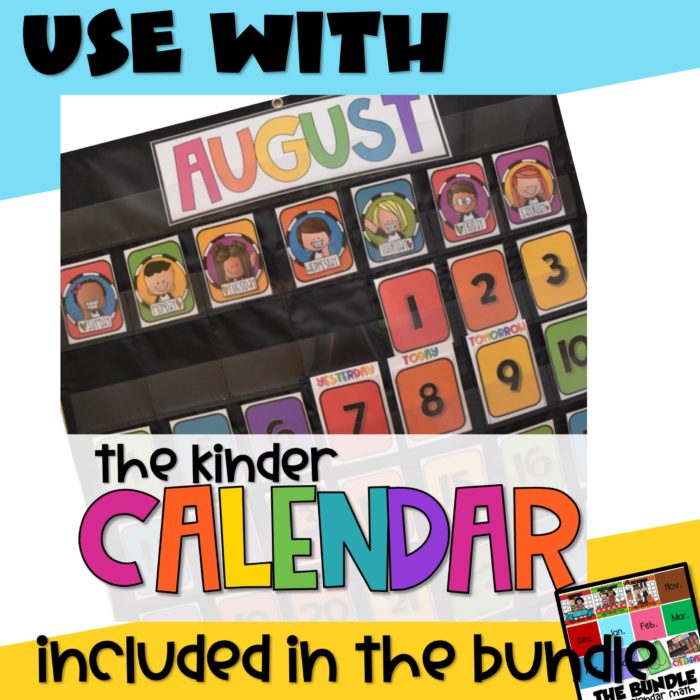
Finally, each month has its own set of daily labels. August focuses on direction, but subsequent months include sequence cards to teach a sense of time. Your students will use the daily labels on a few of their worksheets. But, you can use them with your pocket chart calendar. The calendar we use with DAILY CALENDAR MATH for KINDERS is called the KINDER CALENDAR and it is included in the bundle!

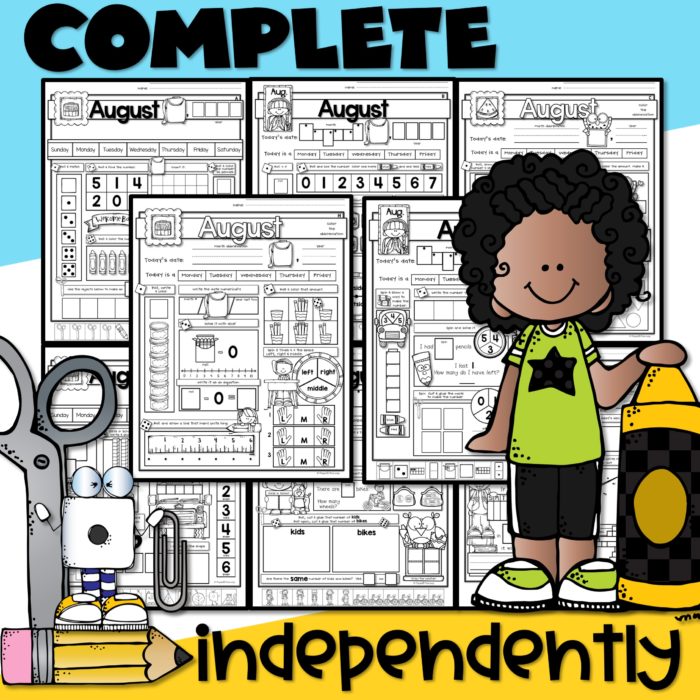
If you haven’t grabbed AUGUST, what are you waiting for? You are going to find this pack is not only a good teaching tool, but also a great way to assess your students’ math skills!

KinderClips MORE, LESS or the SAME 0-10 Cards

Just posted a new resource to help you develop your students’ number sense!These KinderClip MORE, LESS or the SAME Cards will develop your kinders basic number sense with counting, cardinality, one-to-one correspondence, and number identification.

On each of the 32 KinderClip MORE, LESS or the SAME Cards students will count/identify the number in each square and then follow the signs (>, < or = to the target number-–identified by counting fingers in the center frame of each card) to determine if that square contains a correct answer.
Although this set of KinderClip cards covers numbers 0-10, your students will identify numbers 0-14 as numerals, objects, base ten blocks, tally marks, marks on ten frames, dominoes and dice. They will also identify numbers on a number line, as a measurement, and on bar and line graphs.

Grab it here for half-off through tomorrow!

CRAZY for CVC GAMES!

Summer is full of fun…and planning for next school year! As we begin First Grade next year, we’ll be reviewing CVCs. Instead of using lots of great worksheets, we are going to start our year with CRAZY for CVC GAMES!

The best part about these CVC games is that the are ALL in black and white. No expensive colored ink needed here! So, grab your favorite Astrobright cardstock, and start printing up some learning fun!

THE BUNDLE will contain 30 games–six games for each CVC vowel group. These games can be used during the KINDERGARTEN school year in small reading groups, morning work tubs, for fast finishers, literacy stations, etc. Whatever works best in your class!

Now…for a look inside each of the games in the short A pack:

In GAME #1, playing with a partner, or alone, your students will read CVC words and mark their pictures on the game board. We like using Mathlink Cubes for this activity, but you could use whatever game pieces you have on hand. When they have found five words in a line, they win! Or, they could be like my kids, and keep reading and marking words until the whole board is full of math cubes!

GAME #2 is a word family Tetris puzzle. It is a great tool for assessing your student’s word family knowledge and critical thinking!

Using the game board from GAME #1, your students will cover the words that rhyme (that are in each word family)with the correct word family puzzle piece.

GAME #3 has four different TRACTOR RIDE game boards (#1: -ab & -ad; #2: -ag & -ax; #3: -am & -ap; #4: -an & -at). Your students will find and build the medial A CVC words on each board by drawing clue cards. Each clue card will give them a beginning or ending letter that they will use to find the word. This game can be played with a partner, or alone.

GAME #4, BOGGLE BUDS is a fun way for your students to practice their beginning reading skills. This short A pack has four different Boggle Bud boards (try saying that 5 times fast :).

Students will search for CVC words using three letters (including the medial A) that are touching each other in any way–sideways, up and down, or diagonally. The words can also be formed forward or backward.

GAME #5 is sure to be a class favorite. Who doesn’t love candy?!? It is really a fun way to practice reading and rhyming words.

I printed the rhyming boards on white and the candy on all different colors of cardstock. But you could print all the candy on one color (that matches the title page) or, if you’d like to use this activity to introduce the word families, you could print each word family’s candy in one color (a different color for each word family). Your students could then spend less time discerning the word families and more time simply reading the words.


In Game #6 your students will put all of their reading skills together by building sentences with CVC words. There are 6 different picture strips in this game. Each picture strip has a set of word cards (distinguishable by the matching picture on the word cards) associated with it. Only names are capitalized on these word cards.

Your students will read each word card and then order, and re-order them until they come up with a sentence that matches the picture strip. Next, they’ll write the sentence into their “My Little A Book” using a capital letter to begin their sentence and appropriate ending punctuation. The only sight words included in this set of sentence building cards are “is” and “the”. Your students should be very successful completing these sentences independently.

As a mom of 8, I need to be organized, or not much gets done :). So I want to share with you a couple of ideas on how you can organize the CRAZY for CVC GAMES.

The first is super simple and fairly inexpensive. Print the title pages for each game on a different color of cardstock. Paste them onto large manila envelopes and tuck all of the game pieces inside their envelopes.

If you are into IRIS containers (who doesn’t love them?!)–all of the game envelopes can be stored in one of their 11 x 13 project containers.

Another idea is to store all of the game pieces in a 4×6 IRIS container and the larger title pages and game boards in a plastic envelope (I love these by the way! They can handle daily use a lot better than their manila cousins).

Everything fits in, nice and tidy :).

So…6 simple games…low prep…lots of fun…and perfect for teaching/reinforcing CVCs with a medial A!

You can grab the short A set on sale through tomorrow. Or grab the whole bundle today! The bundle price will go up as I add each letter’s games.

ONE-TO-ONE CORRESPONDENCE with Classroom Tools

When it comes to teaching our youngest students numbers we often focus on counting. Counting involves memorizing the number words in the proper order (one, two, three, four, five…). Many young children easily memorize the number words in their proper order, but often do not understand the concept of one-to-one correspondence.

ONE-TO-ONE CORRESPONDENCE is being able to skillfully count an actual number of objects. A child that understands one-to-one correspondence knows that 2 cookies = 2 or that 5 raisins = 5. Our students need many opportunities to practice saying one number with one object.

Here is GREAT way to begin next school year with 1:1 correspondence:This 220-page ONE-TO-ONE CORRESPONDENCE ACTIVITY PACK can be used with tools already in your classroom to build 1:1 correspondence in your students!
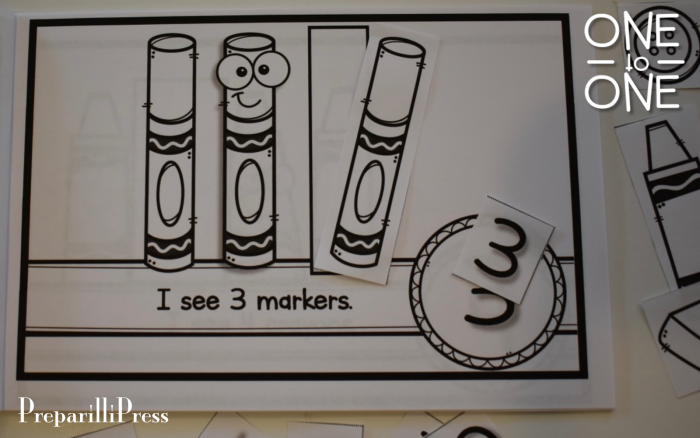
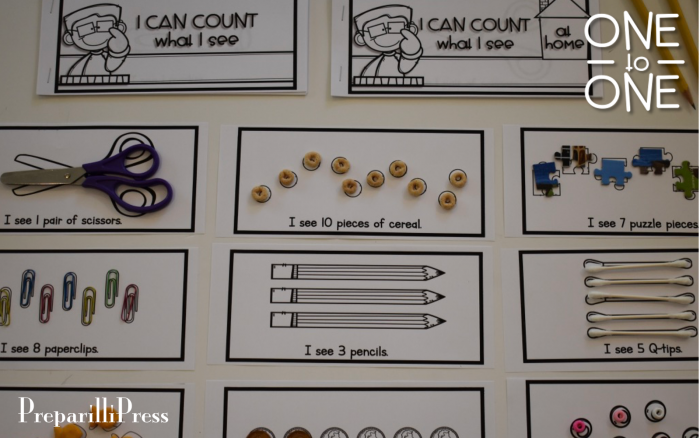
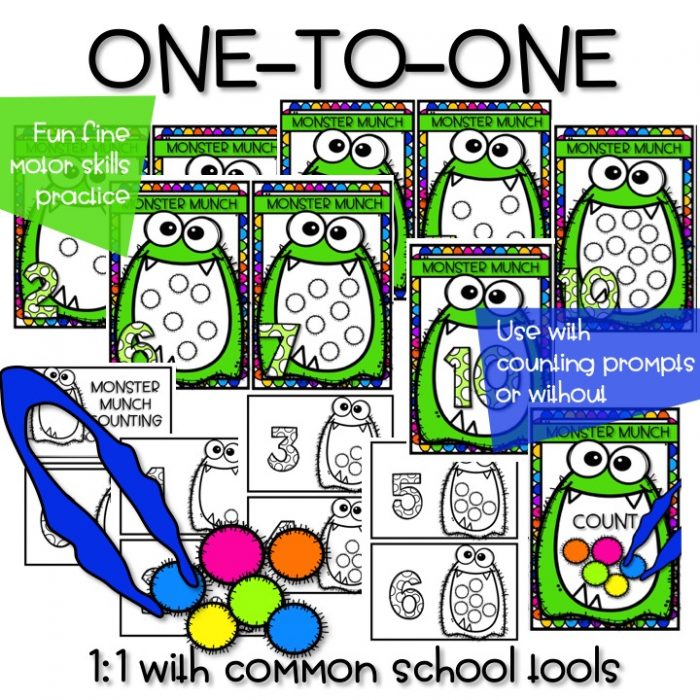
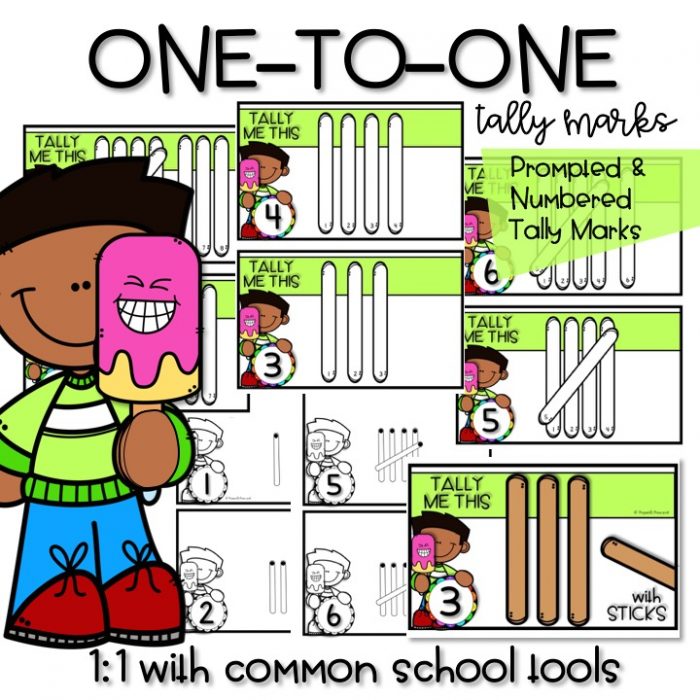
All of the activities in this pack include mats and booklets WITH prompts, for your newest number learners or students that need additional practice, and WITHOUT prompts (so you can assess your students’ learning).

In this first activity, your students will count with Play-Doh containers, erasers, markers, crayons, counting bears, dice, math cubes, pom-poms, buttons and paperclips. The School Buds 1-10 booklet includes numbers and shapes to glue on the pages–matching the number and completing the count.

The “I Can Count What I See” sheets can be used as additional task cards, or stapled together into booklets. They use some of the same manipulatives as the previous set, or ones that your students can find at home (scissors, Q-tips, elbow macaroni, Cheerios, Goldfish and small puzzle pieces).

Another fun way to count (and great for fine motor skills) is to clip what you count. With these color palettes, your students will be challenged to use the clips with both of their hands.

The Count and Color booklet, like all of the other ones you will see in this post, can be completed with dot markers and crayons. Or you can use these sheets as additional task cards and your students can count with Play-Doh, clothespins, push pins, hole punchers, moon sand, regular sand, finger paint or even edible counters (yum!). The possibilities are endless! The more your students practice, the better they will get at 1:1, number recognition, and counting.

Here is another great way to incorporate fine motor skills into your 1:1 correspondence lesson–plastic tweezers!

And, I love this Button Up activity. You don’t just have to use buttons, either!

These multi-sensory mats are great for instructing correct number formation along with the 1:1 relationship. And, what child doesn’t love Play-Doh? (If you have one, just use bingo chips :)!

To form the numbers, have your students place their pointer finger on the star and talk them through the number formation. For the Number 4 I would say, “Start at the top on the star. Short line down. Stop. Straight line over. Stop. Now jump up and make a big, straight line down. Stop.”

With a die and a partner, your students can play DICE COVER-UP. They will roll the die and cover the die face they rolled, or its number. First one to cover all of the spots on their game board wins! Two boards are included–one that is in numeric order, and one that is not.

With this multi-sensory activity, your students can build ten-frames, practice correct number formation and “write” the number word.

Count and stack the math cubes on the Counting with Cubes mat.

Teach tally marks with Popsicle sticks. The prompts on the Tally Me This mats are numbered to help your students learn to tally from left to write and slash for 5.  
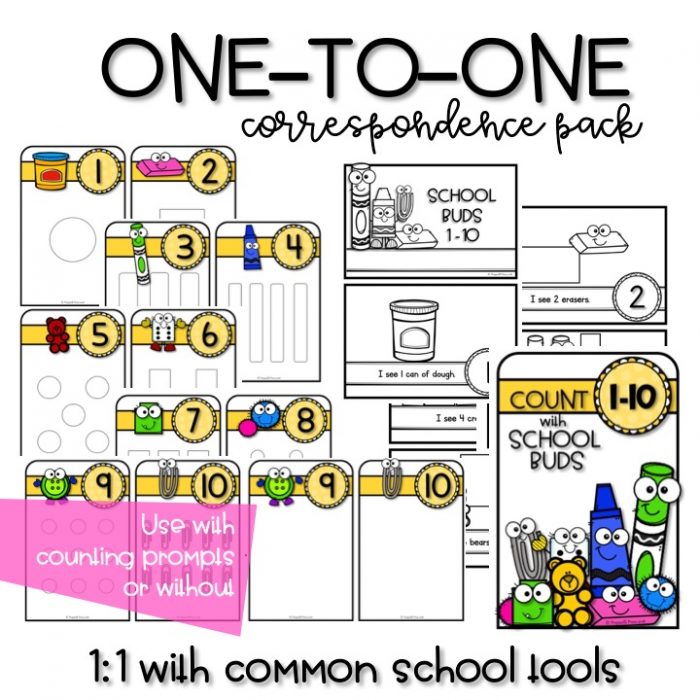
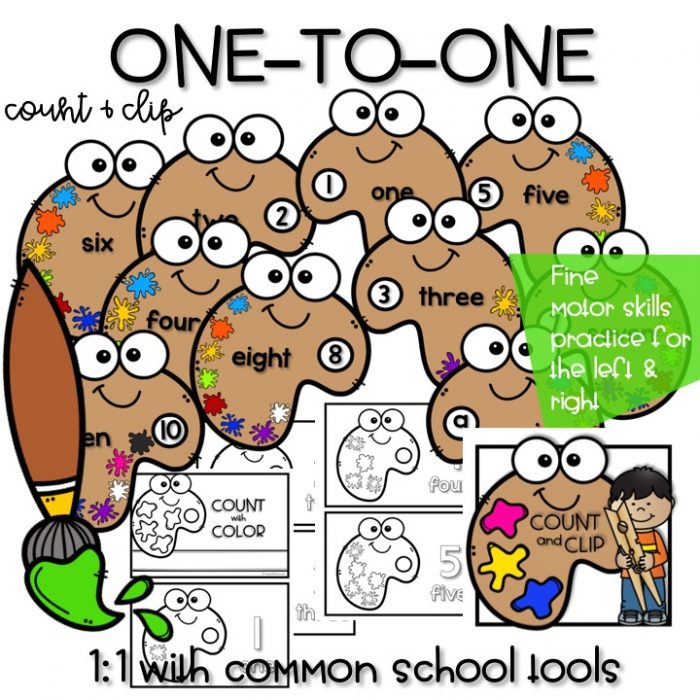
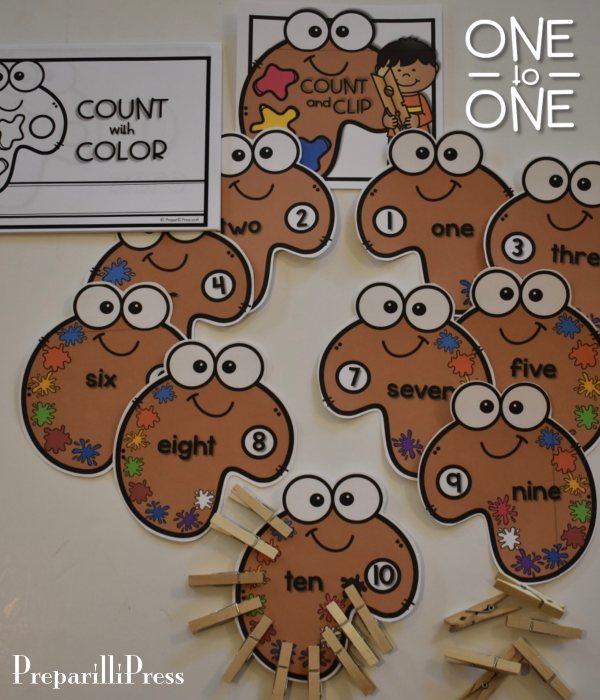
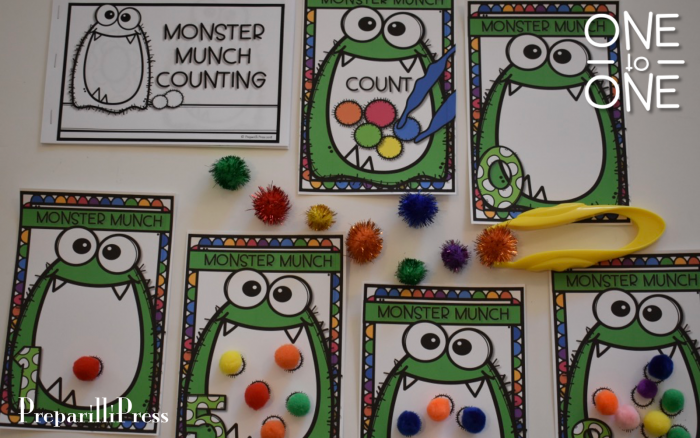
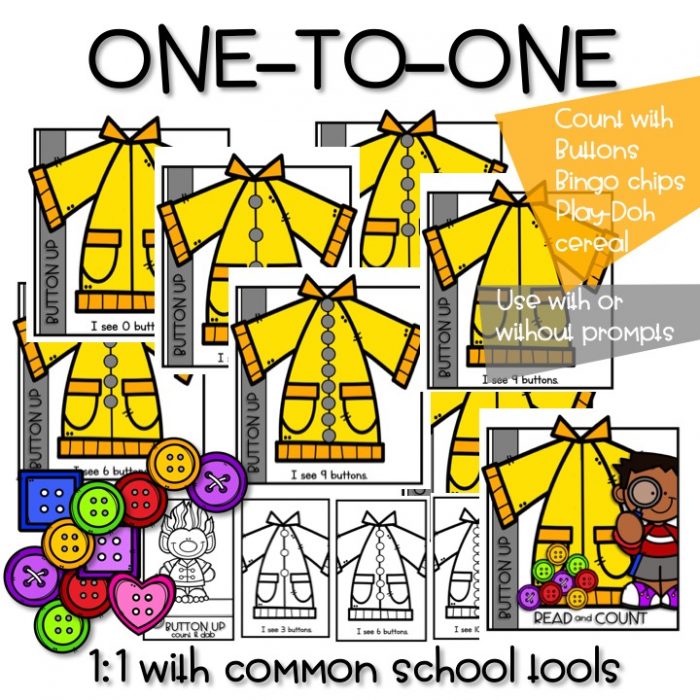
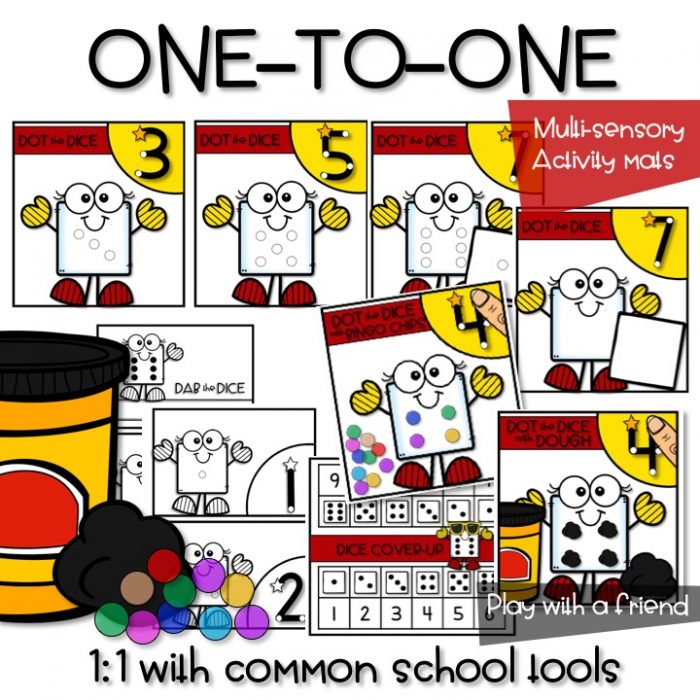
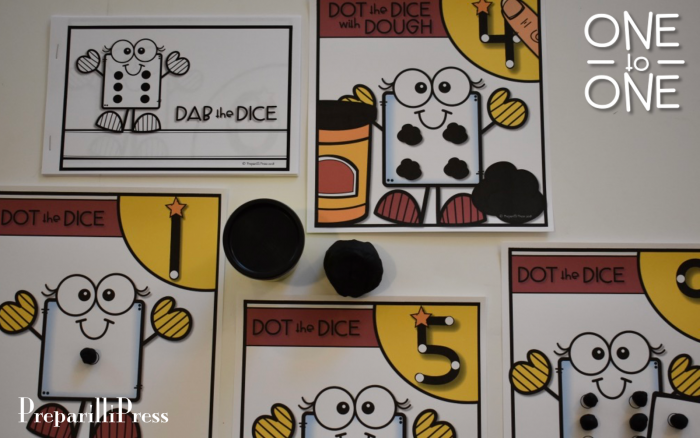
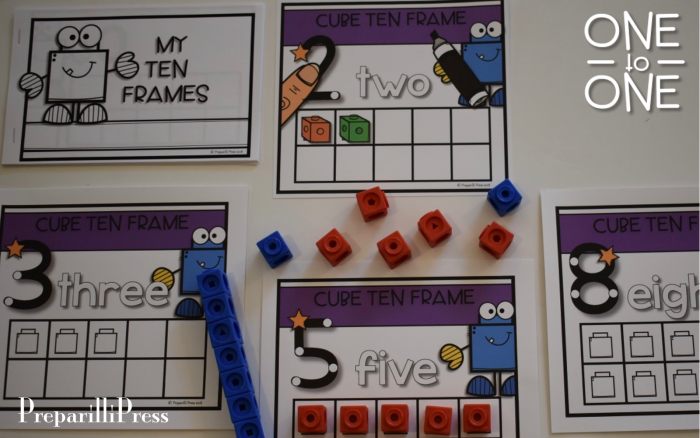
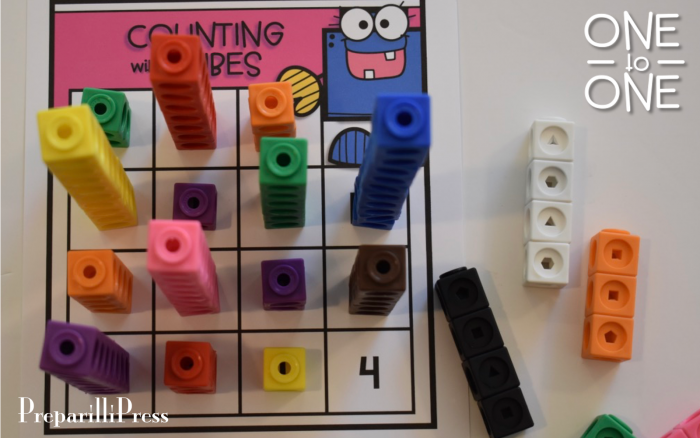
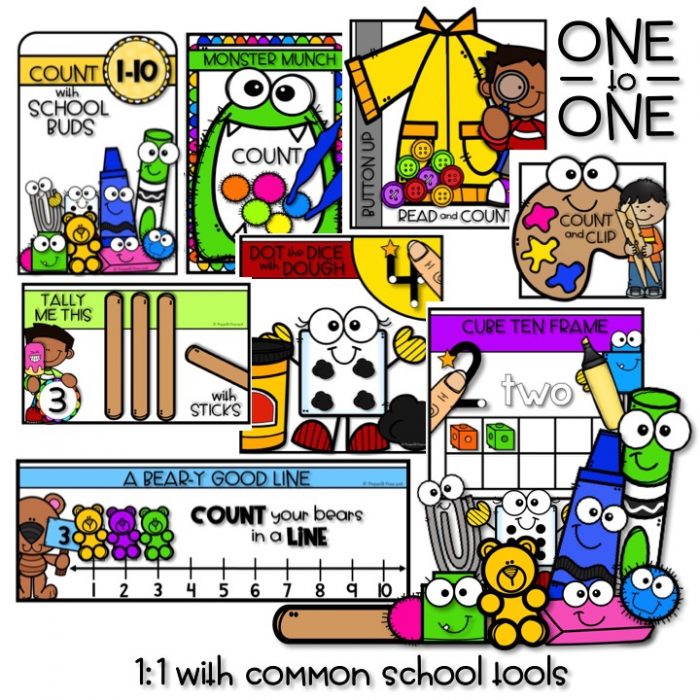
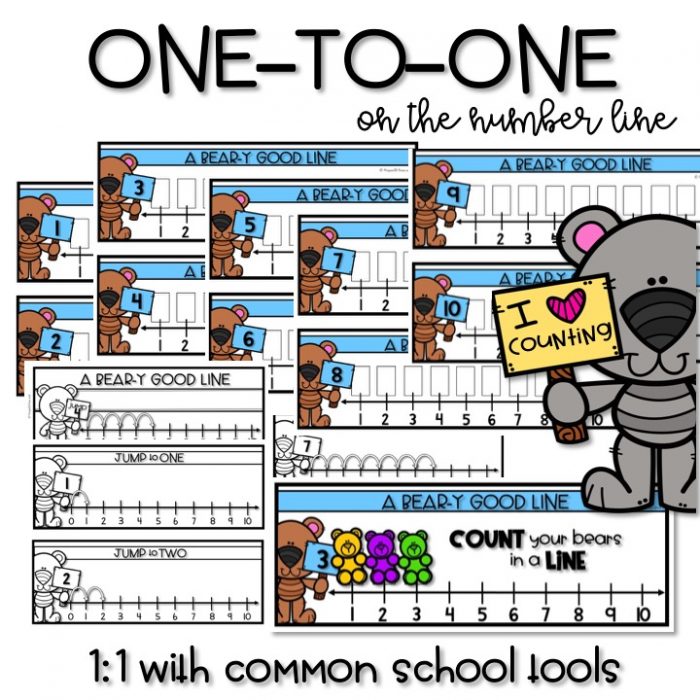
Finally, teach 1:1 correspondence using a Bear-y Good Line (and counting bears).

You’ve gotta get this set! Your students are going to LOVE math. So, go grab it for 1/2 off today (here)!

Time to Celebrate!

How do you celebrate your Kindergartener’s birthday while inspiring their little minds to grow? I’ve got something fresh and fun for you to use:
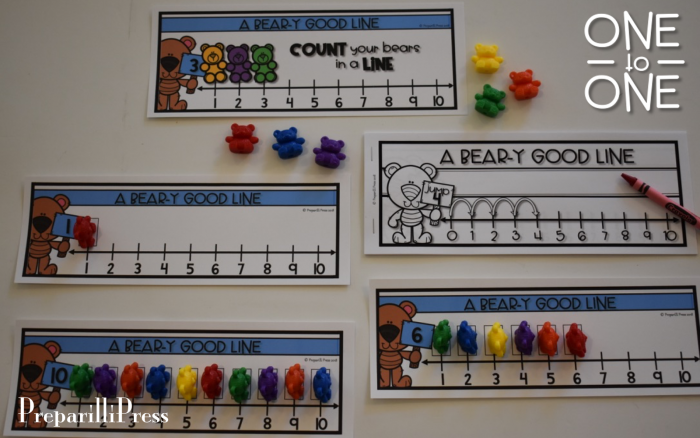
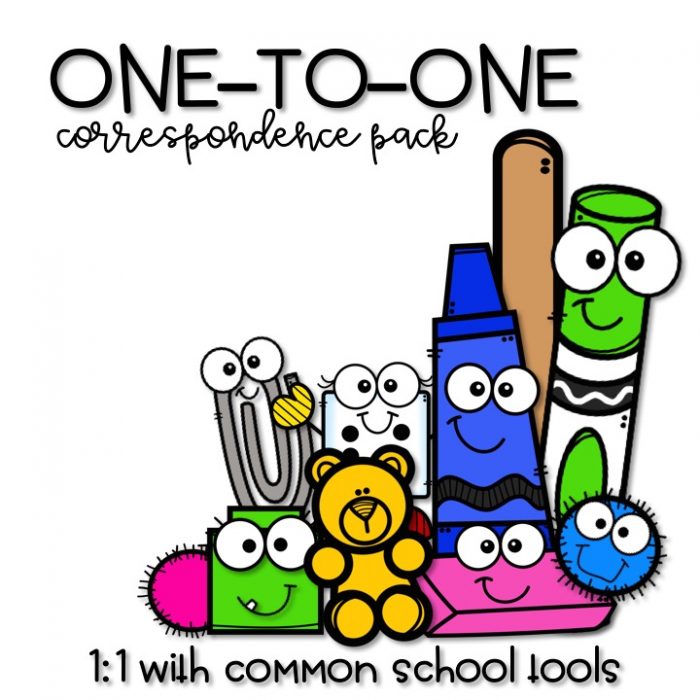
It is jammed-packed with hands-on, independent learning for your pre-K and Kindergarten kids!

1.  Your students will celebrate by sorting SHAPES of presents, balloons, cakes and candle flames on the party mats.

2.  Your students will celebrate with COUNTING and NUMBER ORDER. They will count and clip cupcakes; count and tally gifts and candles; roll, move, and stamp (or write) numbers from 1-6; put the candle numbers in order; and color-by-number sense code.

3.  They will celebrate with ONE MORE and ONE LESS. They will count the gifts and clip the number that is one more. Then count the balloons and clip the number that is one less. Finally, they will roll one die and stamp dots on the presents–decorating the wrapping paper; roll two dice and add sprinkles to the cupcakes; roll three dice and add candles to the cakes.  All of the adding sheets have ten and twenty-frames to help your newest mathematicians total their rolls.

4.  They will have a blast celebrating with MORE, LESS, or the SAME (>,< or =). Your students will follow the signs on these clip-it cards. They will clip all of the object that are greater than, less than or equal to the target number. {This set covers numbers 0-5}.

5.  Time to have some fun with PLAY-DOH! Your students will form their number and then roll that number of balloons, candles and presents.

6.  Your students celebrate with LETTERS and ABC ORDER! Using the gift letters, or any other lowercase manipulative you have on-hand (you can also use a dry-erase marker), your students will finish the alphabet sequence. There is also a birthday crossword puzzle to enjoy!

7.  They will celebrate with LETTER SOUNDS and MATCHING UPPERCASE with LOWERCASE.  They will strengthen their phonemic muscles as they sort the pictures that begin with FR from those that begin with PR. They will also build easy-cut (gotta have easy-cut!) Party Puzzles–matching the uppercase and lowercase letters with items that begin with that letter sound (hard sound for G and long vowel sound for I).

8.  Celebrate all of those BIRTHDAY MONTHS by sorting appropriately decorated cupcakes and month symbols. You can practice recognizing and ordering the months of the year; print a second copy of the cupcakes or monthly symbols and match them; match the cupcakes to their month symbols; and build the months of the year using the sorting mats, month name cards, cupcakes and symbols.

9.  Finally, grab those crayons, scissors and some glue! It is time to celebrate by COLORING icing with the Cupcake Colors booklet (includes one version with colored prompts and another completely black-and-white). Your students will also practice SEQUENCING the steps they take to wrap a gift.  After ordering the cards, they will match the phrases they have to the cards and then glue the phrases (in order) to their recording sheet.

You will definitely be crowned Teacher of the Year after this fun week of school! Your kids are going to LOVE completing all of the activities that lead up to the BIG celebration of their birthday.

Grab this jam-packed set for half-off this weekend!!!

Star Wars Jedi Centers for Number Sense & Counting 0-10

New math centers for your Jedi half off until Sunday!

This set of STAR WARS JEDI CENTERS is loaded with Number Sense, Counting, and One-to-One Correspondence activities for the numbers 0-10.

Each numeral is represented with a Star Wars character ten frame, Lightsaber tally marks, Death Star dominoes, Tie Fighter dice, stars, money, counting fingers, and in its number word form.

“I CAN” Droid Direction cards for independent work are included for each activity.

Your students will:
** Sort Odd and Even numerals
** Identify numerals that are Greater Than, Less Than and Equal to others
** Identify Before and After numbers
** Count-On from a given number
** Count Back from a given number
** Complete a variety of Number Sense/One-to-One Correspondence activities for each numeral (counting fingers, number word and money; tally marks, dice and stars; ten frame and domino)

Three One-to-One Correspondence Mats are included for any target number (1. Number word, ten frame, Lightsaber tally marks and stars; 2. Number word, counting fingers, money and Tie Fighter dice; 3. Number word, ten frame, Lightsaber tally marks and Death Star dominoes).

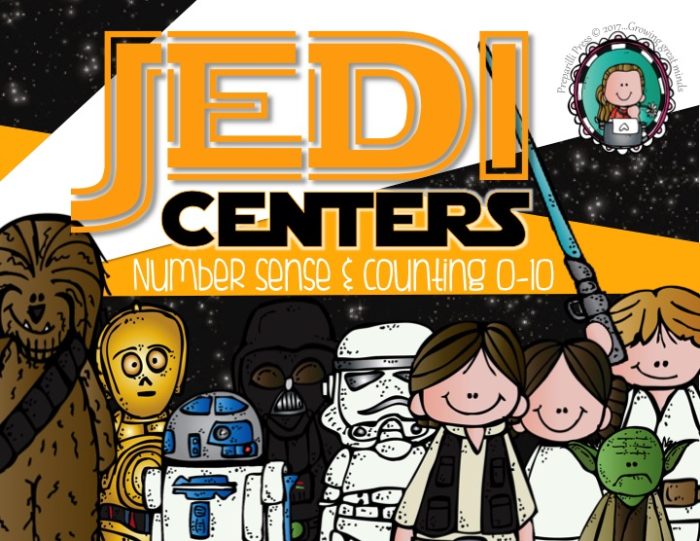
Sort counting fingers, numeral word, and money for each number

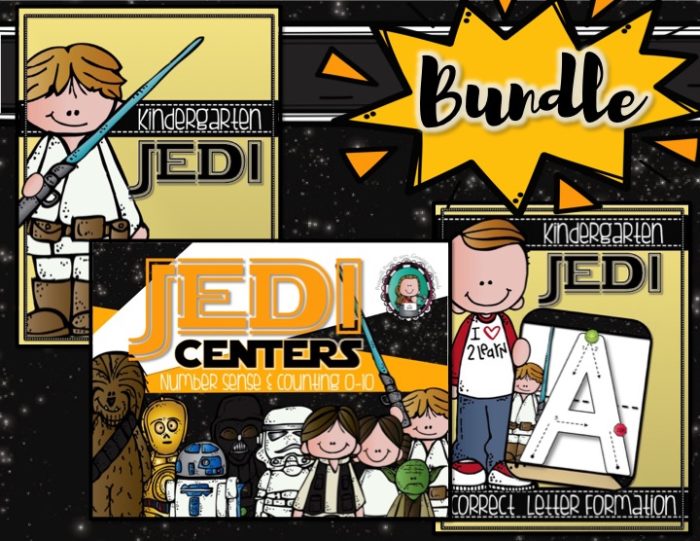
Sort lightsaber tally-marks, tie fighter dice and counting stars for each number

Your students can compare any of the numeral tiles in these activities.

Hook two Count On or Count Back strips together to challenge your students.

There are six “THE NUMBER” recording sheets to asses what your students have learned after they have completed a variety of the centers. These sheets ask your students to complete various tasks including:
** Identifying if the target number is odd or even
** Writing the number word
** Dotting the ten frame
** Counting the number by circling or coloring objects or drawing their own
** Showing the number on dice, dominoes and fingers
** Drawing the number as tally marks
** Identifying the numbers that come before and after
** Identifying numbers that are greater or less than the target number
** Counting on, or back from the number.

Grab them today while they are on sale! Your Jedi are going to love them!

Word Work for First Grade {and beyond!}

Are you helping your students develop a solid understanding of phonemes–the sounds letters make, either alone or in concert with other letters? This is the year to do just that! In First Grade, students are introduced to so many new letter combinations and sounds it can be a bit daunting to teach. Today, I’m going walk you through our approach. We are aiming for comprehensive, cohesive instruction that encourages a LOVE for words + learning = great readers and spellers!

1. INTRODUCE the NEW PHONEME 

Most of your students will be familiar with the QU digraph (it isn’t a literal digraph, but for arguments sake, lets just call it one :). They are familiar with the QU pairing (Q is always written with U). But, take the time to review all of the words they can already read with this digraph.  We began by matching pictures to their words on the quilt (in our Interactive Phonemic Notebook). We also used a QU slider (from our QU flapbook) and segmenting and blending cards.

2.  MAKE a PHONEMIC POSTER

This is a FUN way to get your students using new sounds and working on alliteration. I always have my own poster ready (I’ve made a new one for QU), but BEFORE I show it to them, I have my kids make their own. This is how we do it:

I give them a graphic word list (the words are categorized by names, verbs, nouns and adjectives) and ask them to pick their favorites and write them down on the My Blends Sentence sheet. Then, they follow the formula to make a sentence and draw a picture to demonstrate it. Once they are finished, we go over their blends sentences and I show them mine:

3.  TIME to DEVELOP YOUR PHONEMIC MUSCLES

Next, we jump back into our Interactive Phonemic Notebook and learn new words (the new words are also presented on the Segmenting/Blending Cards). We will read, write, recognize, and segment them.

This is a great time to review other words (with blends and digraphs recently mastered) that rhyme with the target sound (QU) words.

4.  PHONEMIC SPELLING and ABC ORDER

Now its it time for phonemic spelling–using the words your students can sound out (recalling blends and digraphs already learned). We make it FUN with Phonemic Strips (the arrows in the picture) and a place to store them (the quiver).

We use the Phonemic Strips to practice alphabetical ordering. This is a nice challenge since all of the words we are working with this week begin with QU. The sliders help to hold each word in place. Once the order is correct, the words are recorded.

5.  BLEND ME a STORY

Now that your students can recognize so many new words, they should use them. Writing a quick story focusing on the target blend (QU) is a FUN way to do just that.

6.  SHOW ME what YOU KNOW {PHONEMIC FLIPS}

After all of the great word work your students have done with QU it is time for them to have some FUN showing you what they know. They will do this with the QU Phonemic Flips.

With this interactive blends booklet, they will use a dry erase marker, a blending dice–I like using foam dice :), but you can easily build the blends dice included in the pack–and lowercase letter manipuatives. I know a lot of you are fans of the magnetic letters. You are welcome to use these instead of the lacing letters we use. {Flip}

Circle all of the pictures that begin with the target sound (he circled “question” after I took the photo :). {Flip}

Read the passage and find all of the words that begin with QU. I try to keep these stories as simple (and funny) as possible; but your students will need help with a few of the words (i.e. taker, answering, question, queasy). {Flip}

Now its time to use the dice (this is my kids’ favorite task–it turns into quite a game). This is where you’ll be able to assess the strength of your students’ phonemic muscles. They will roll either a K, QU or W and write it in the blank. Then sound out the word and decide if it is real, or not.  Only real words receive a check mark. {Flip}

Using the letter manipulatives, your students will build the words we have worked on all week, phoneme-by-phoneme. One thing I like to do at this stage of word development (which you might not be used to 🙂 is link the letters together that make the new phonemes (I heart glue dots). So, in this photo the QU, CKs and TH are glue-dotted together. This is a simple technique that will help your students recognize that these letter pairs stick together to make the new sounds they are learning. And the great thing about glue dots is they hold tight, but are easy to remove. As your students’ phonemic learning progresses, the glue dots disappear. {Flip, flip, flip, flip, flip–there are 20 words in this section}

7.  REVIEW THOSE DIGRAPHS and BLENDS

Great readers and spellers don’t develop overnight, so reviewing what is learned is always helpful. We like these word building exercises (they are a part of our Interactive Phonemic Notebooks–pictured next to the QU story).

And this PENCIL BOX independent work center:

Simply take the segmenting/blending cards and fold them along the mid-line:

Using clothespins, your students will attach the word to each picture and then self-check, flipping the segmented word forward to match the word they have attached.

So, that is how we do it! What do you think? Are you ready to dive into phonemic instruction & word building?