STAR WARS Parent-Teacher Conference Pack

This is for all of my teacher friends who love Melonheadz Star Wars characters as much as I do!

Two files are included in this Parent-Teacher Conference Pack. One is loaded with Print-n-Use forms.  The other is a PowerPoint file with editable forms. This pack also has lots of options for coordinating with parents as well as creating progress reports that work for you and your students/parents.

Here is  peek at what is included:

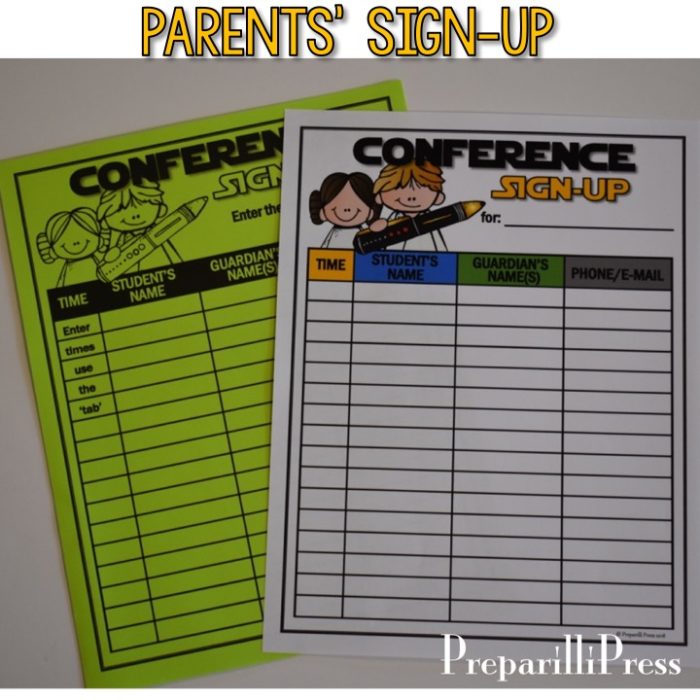
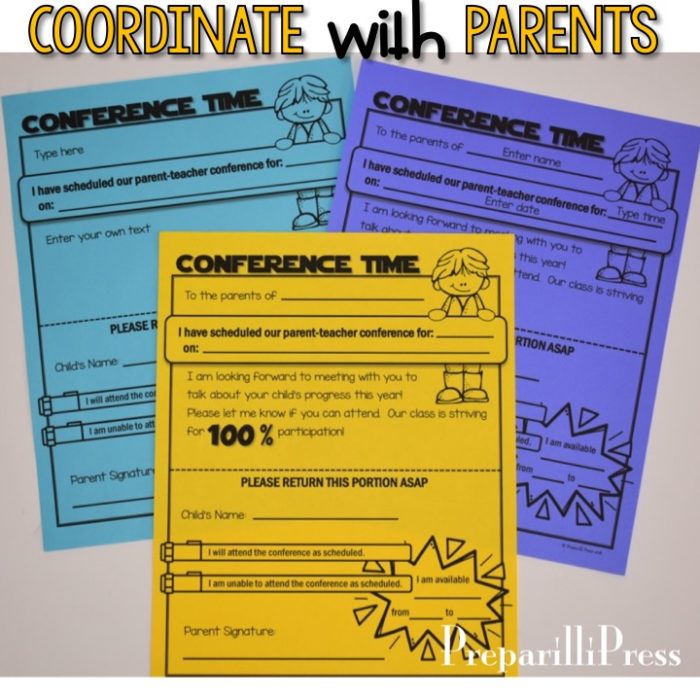
This form you would send home and have your students’ parents give you 3 dates/times that they are available. With the other set of forms (see below) you would set a time/day for each parent to meet with you (based on the sign-up sheet). They would return the bottom half of the form to you with their reply.

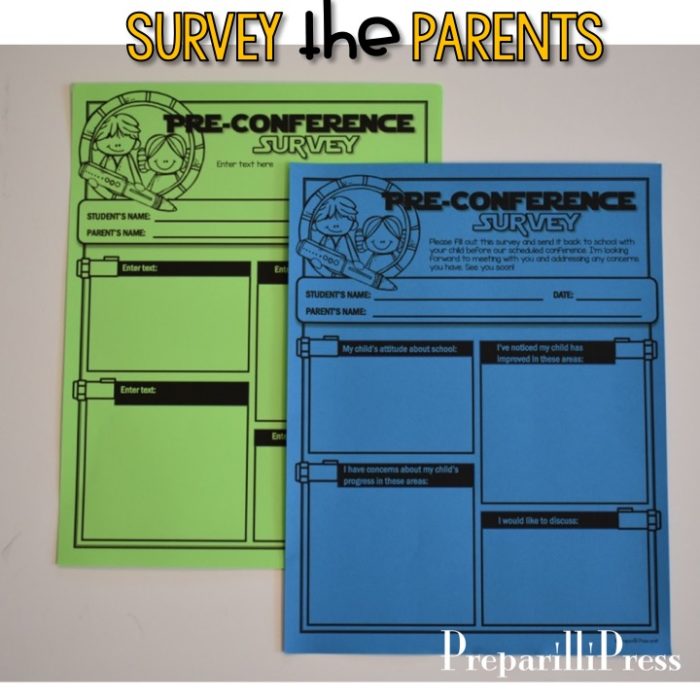
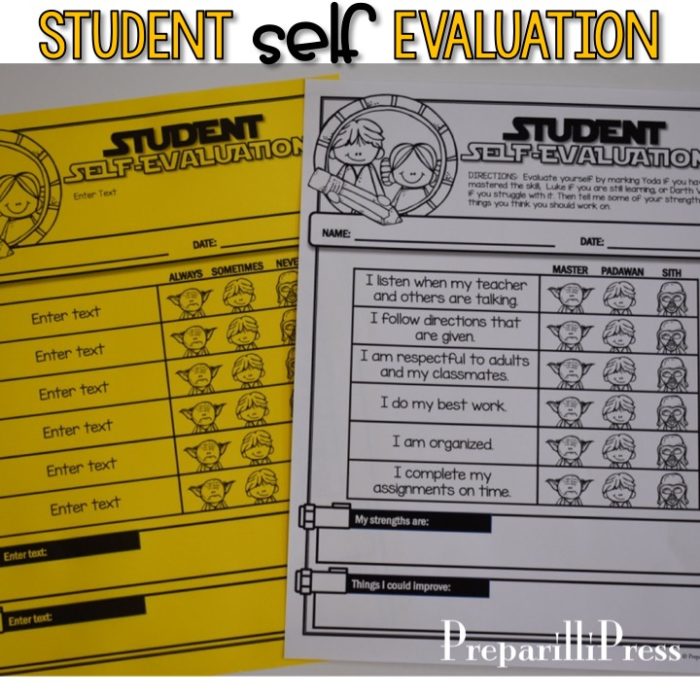
Use this next set of forms to find out what your students’ parents concerns are, and what your students think about their own progress.

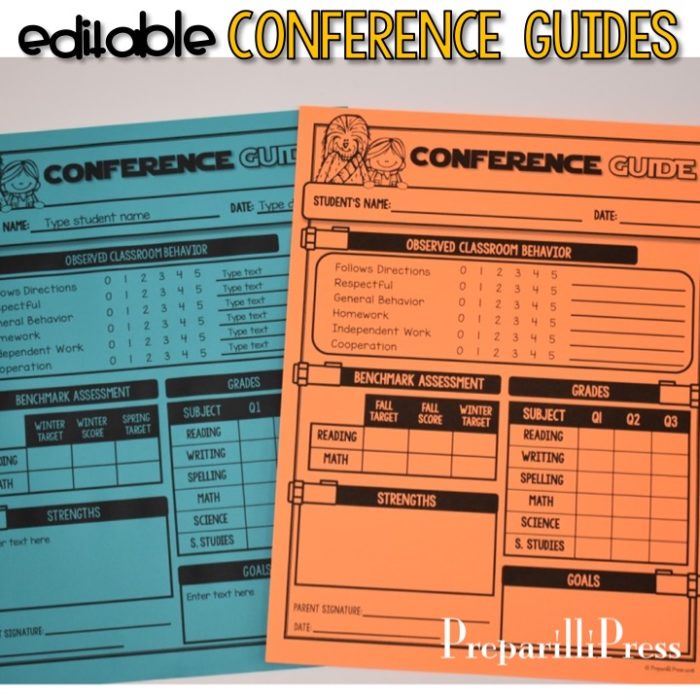
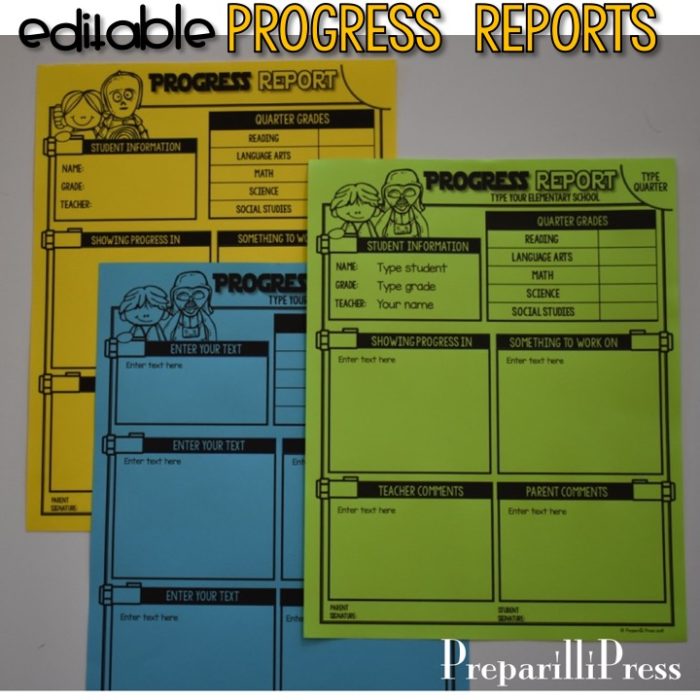
And now, here are the options for gathering all of your data and generating a progress report or student summary. Choose the one that works for you and your students/parents.

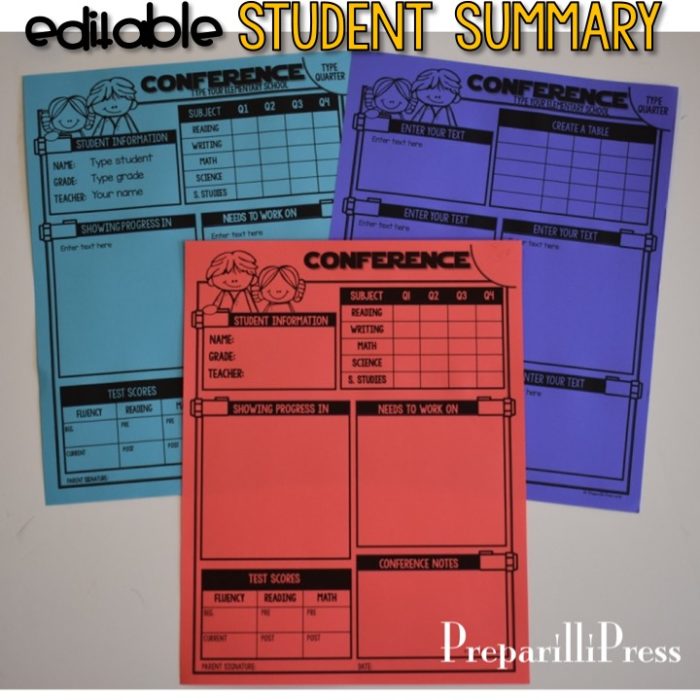
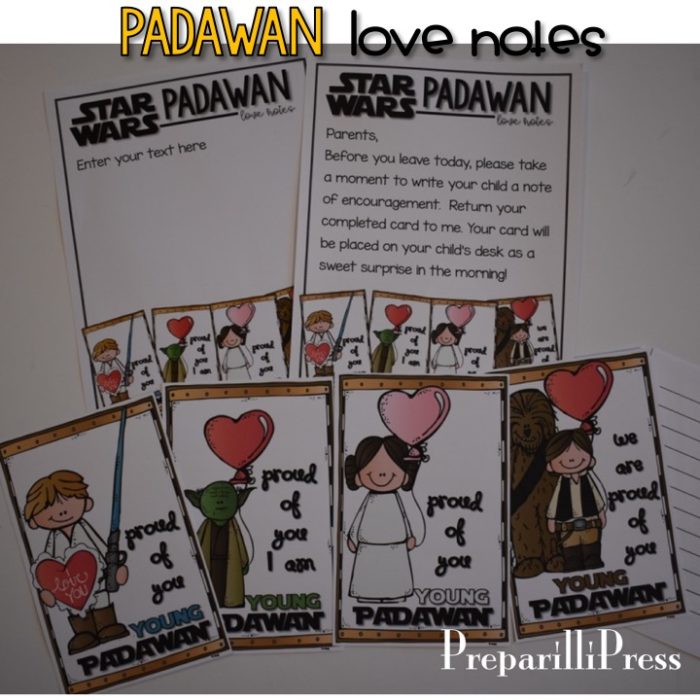
Now, you are ready to hold your conferences! Be sure to have this sign-in sheet printed and some Padawan Love Notes ready for the parents to leave their children. 

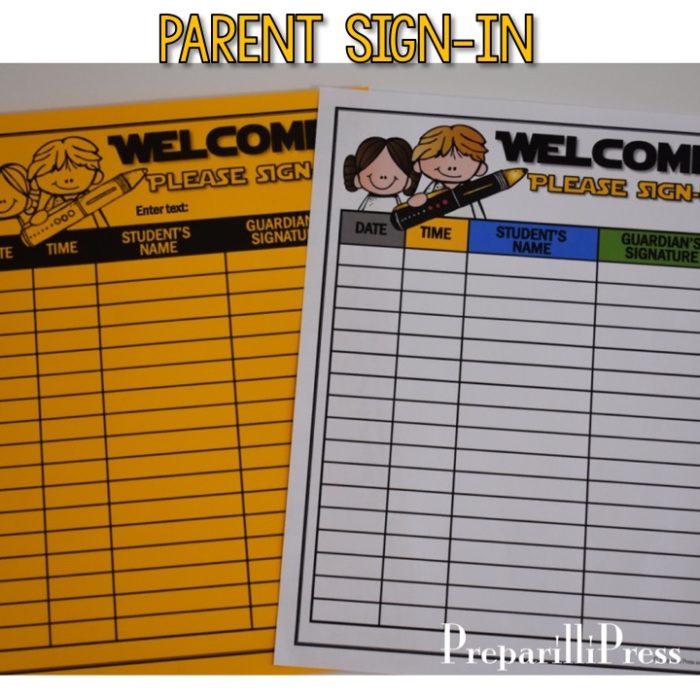
This set will be on sale through Friday! Hope you love it!


NO-PREP Syllable Worksheets

I’ve bundled all of the NO-PREP worksheets from our growing syllable instruction packs for you!

Syllabication rules covered in this set include:

1. OPEN and CLOSED simple syllables (3 activities)
2. VCCV with Double Consonants (4 activities)
3. VCCV with Mixed Consonants (4 activities)
4. V/CV (6 activities)
5. VC/V (6 activities)
6. Magnetic Y (V/CY) (5 activities)
7. C+LE (5 activities)
8. VOWEL TEAMS (4 activities)

PLUS, built-in REVIEWS/ASSESSMENTS are included! After a new rule is added, all previous syllable identification rules are reviewed.

This set will be half-off through Saturday!

100th Day Photo Booth WRITING PROMPTS

Here is a FUN way to accomplish some writing on your 100th Day of School–Photo Booth Writing Prompts!

There are three to choose from:

1. NOW I KNOW–to celebrate that they are 100 days smarter, your students will write 5 things they have learned so far this year. Color and black and white are included.

2. I WISH I HAD 100–what do your students wish they had 100 of and why? Find out with this writing prompt! Three different color options as well as black and white are included.

3. WHEN I AM 100 I WILL HAVE–similar to a bucket list, your students will list the places they hope to have gone, things they hope to have seen and accomplished by the time they are 100. Two skin tone options and black and white are included.

As shown in the product photos, we used our WRITING PROMPTS with Creative Clips’ Photo Booth Props and had a lot of fun with them! You can use your own additional props, or grab Krista’s here.

Happy 100th Day of School!

Let’s Master Multiplication!

We love Math-U-See’s curriculum! All of my kids have benefited from the instruction and structure of this math program. But, although we are not yet at the end of a school year, my Gamma girl is “finished” with her math for the year.  (Math-U-See’s Gamma is a 30 week multiplication curriculum and our school year is 36 weeks :).

Like you, I don’t want my children experiencing the summer slide–especially since summer hasn’t officially begun around here. So, this is what we do:

Slide1Mastering Multiplication is great for review!

mmA


For each number, 2-16, your students will review skip counting with that number (multiples) and apply it. They will write equations, solve the arrays, determine factors, create equivalent fractions and answer simple word problems.

Slide1

Then we review that number’s standard units of measure and apply it with real-life examples.

Slide2

Mastering Multiplication also reviews squares and prime numbers. And the fluency sheets are the icing on this math-cake! Your Gamma kids are going to LOVE this review and you will have the next four weeks of math covered!

Grab a copy this weekend (Saturday & Sunday, 14-15 May) from my TPT store for 20% off!!!

SigBlk5

Graphic Multiple-Digit Multiplication

For some of our children, like my eight-year-old, multiple-digit multiplication can be quite a challenge. It isn’t the math facts that are a stumbling block, its the structure–the placement of products–that creates a problem. So, after multiple explanations of the WHYs and WHEREs with me watching like a hawk as she worked each problem, I decided we needed a different approach.  One that appealed to her visual learning style, but didn’t keep her stuck there–always needing the visual cues.

Slide01

Graphic Multiplication is based on a two-step traditional method approach to multiple-digit multiplication.  Your students will find all of the products FIRST, and add SECOND. They will also CHECK their own work–immediate feedback to ensure success.

IMG_8096

Graphic Multiplication has three stages, or levels of computation independence. You can see the variation between the three stages with these two sample problems.

Slide3

Once your students have mastered STAGE ONE—the graphic organizers that identify the place value of each number and number’s location for each step—they should complete problems on the STAGE TWO graphic organizers that only have the initial prompts. This second set of sheets will test your students’ understanding of the organization of multi-digit multiplication problems. Finally, STAGE THREE sheets have no prompts—just a reminder to be cautious about number placement.

These graphic organizers can be used with whatever math program and multiplication problems your students are working on!

SigBlk5

Week Three {My First Research Paper}

This is the third, and final week, of your student’s first research paper!  (You can view Week One and Week Two by clicking the links). It is writing week and we are ready!  Begin this week by having your students fill in the “Possible Hooks” page of their Research Booklet.  If writing a hook is a new idea for your students, use the worksheet provided in the My First Research Paper download to get their creative juices flowing.

Their favorite hook can then be used in their opening paragraph (introduction). Now, they are “Ready to Write.” Use these cards and the “Revision Checklist”, from My First Research Paper to go over what you expect to find in their rough draft and set them working.

MFRPf1

MFRPf2

When my daughter was stuck (getting stuck is part of the writing process at this age–at any age!!!), she found using her notecards helpful. Be sure to have your students use their graphics in their rough draft as “place holders.” Simply lay them on the page to see how much space they need.  Then take them off and write which graphic goes in that spot.

Once their rough drafts are complete–its is time to publish! They are heading toward the finish line–and need lots of time for writing (and breaks)! Keep encouraging them to finish well.

Oh, how fun it is to be done!

MFRPAnn

MFRP3


Week Two {My First Research Paper}

This week your students will transform their notes into an outline.  Begin this week by ensuring that all of your students’ notecards are complete–as complete as your third graders can get them :)!

The next step is organizing the notecards into groups–the prompted notecards make this a simple step.

MFRPgrp

Now it is time for your students to begin their informational outline–this is part of their Research Booklet. On the first day of starting the outline, just have them enter the topic headings.

MFRPio1

Your students will use the next two days to add in the key points to the informational outline from each notecard.  Don’t let your students write everything from each notecard–just simple phrases to help remind them what important fact they want to include.

MFRPio2

The last day of this week have them develop their working outline (also found in their Research Booklet). This is a KEY step, so don’t skip it :)! The goal here is to condense their topics into three main body paragraphs. So, if they have more than three topics (my daughter had four) in their informational outline, they will need to do a bit of regrouping.  She combined her first topic–Characteristics with her fourth topic, Family Life and Lifespan.

MFRPwo

It has been a GREAT week of Getting Organized.  We are a week away from Getting it Done!! Be sure to encourage your students–they have been working hard!

MFRP2

Week One {My First Research Paper}

Before we jump into the first week of our research paper, let’s take a look at our plan for the next three weeks:

WEEK ONE:  Pick a Topic; begin research—compile information on note cards; document sources in research booklet.

WEEK TWO Finish research and develop an outline

WEEK THREE:  Turn outline into a rough draft and then a final, polished research paper.

I’ve included instructions throughout My First Research Paper (Get Organized and Get it Done!) that will help guide you through each week, so I won’t repeat all that in this post. Instead, we’ll take a look at an example of how our first week went.

MFRP3

Annelise picked Moose to research (which is pretty fun since she has seen a few around our home). We went to the library and were able to find a good book in the junior non-fiction section that described the Moose in detail. She spent Tuesday reading/looking through the book. On Wednesday we went over the Research Booklet, Prompted Notecards and completed a Bibliography of the book that she found at the library. I also showed her how to begin taking notes on the notecards (writing simple phrases and focusing on the facts in the text).  She spent about twenty minutes that afternoon and Thursday filling in the notecards.

MFRP5

MFRPW1